Step-by-Step Guide to Laying Fiberglass Cloth for Boat Repair: No Fluff, Just Muscle Memory
Let’s be real: laying fiberglass cloth on a boat isn’t rocket science, but screw it up, and you’ll be staring at air bubbles, resin puddles, and a repair job that’ll crack faster than your patience. I’ve patched everything from pontoon gashes to sailboat keels, and here’s the no-nonsense method I’ve hammered into rookies.
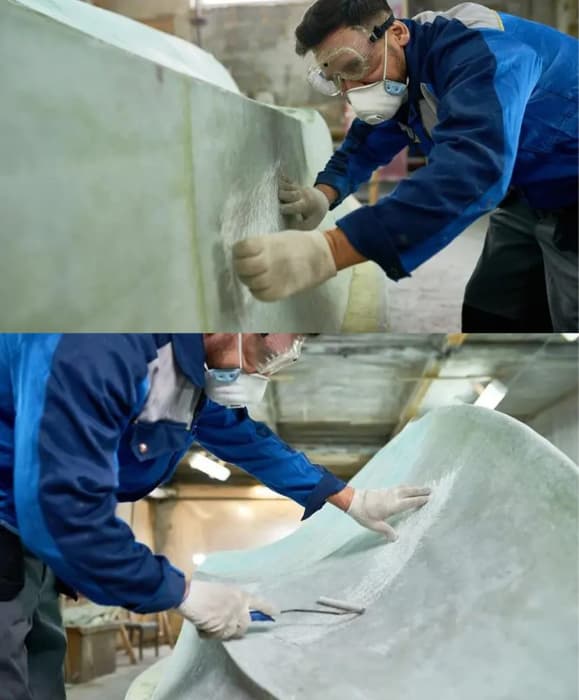
Laying Fiberglass Cloth for Boat Repair
Phase 1: Prep Like a Surgeon (Or Your Boat Will Bleed Resin)
Key tools:
- Fiberglass cloth (6 oz for curves, 10 oz for structural zones)
- Epoxy resin (polyester works, but epoxy bonds like gorilla glue)
- Acetone, 80-grit sandpaper, razor blades
Steps:
- Sand the damage until the gelcoat’s gone and you hit bare fiberglass. No shortcuts—I once skipped this on a speedboat hull, and the patch peeled off at 50 knots3.
- Cut the cloth 2 inches larger than the repair area. Pro tip: Use sharp scissors—ragged edges trap air like a sponge13.
- Wipe with acetone to nuke grease. Water? Dust? Resin will ghost you faster than a bad Tinder date25.
Phase 2: Lay the Cloth—Dance with the Resin, Don’t Drown in It
Critical ratios:
| Cloth Weight | Resin per m² | Cure Time | Best For |
|---|---|---|---|
| 6 oz | 300–400g | 12–24 hrs | Curved hulls, small holes |
| 10 oz | 500–600g | 24–48 hrs | Keels, transoms |
Steps:
- Mix resin slowly. Stir for 3 minutes—undissolved hardener = sticky disaster. Trust me, I’ve ruined a dinghy deck by rushing this25.
- Wet the surface with a resin layer. Too thin? The cloth lifts. Too thick? It’ll sag. Aim for a “golden pancake” consistency35.
- Lay the cloth and press with a foam roller. Work from center to edges—wrinkles are Satan’s confetti. On a 10 oz patch, I’ve used a heat gun (low setting!) to soften stubborn folds13.
- Add resin until the cloth turns translucent. If you see dry spots, weep now or weep later when delamination starts25.
Phase 3: Kill the Bubbles (Or They’ll Haunt Your Dreams)
Air pockets aren’t just ugly—they’re structural time bombs. Here’s how to massacre them:
- Use a “bubble roller”: A $5 plastic serrated roller shreds bubbles better than a luxury SUV shreds potholes.
- Resin viscosity matters: Thin resin (like West System 105) flows into gaps; thick resin (epoxy putty) traps air. Match viscosity to cloth weight35.
- Post-cure inspection: Tap the patch with a coin. A hollow sound = failure. On a fishing trawler, I missed one bubble—three months later, seawater pried it open like a can of sardines15.
When to Walk Away (Yes, Seriously)
- Temperature below 15°C (59°F)? Resin cures slower than a sloth on melatonin. Use a space heater or wait for summer23.
- Rain in the forecast? Humidity turns epoxy cloudy. I learned this the hard way rebuilding a cabin cruiser deck in monsoon season35.
Final Take:
Boat repair with fiberglass cloth isn’t about perfection—it’s about ruthless precision. Use 6 oz for curves, 10 oz for load zones, and treat resin like a jealous lover: give it attention, but don’t smother it. And if you ignore everything else, remember this: Sand like your life depends on it. Because your boat’s does.

Scan the QR Code to start a WhatsApp chat with us.